Top 10 Tips for Successful Lab Design
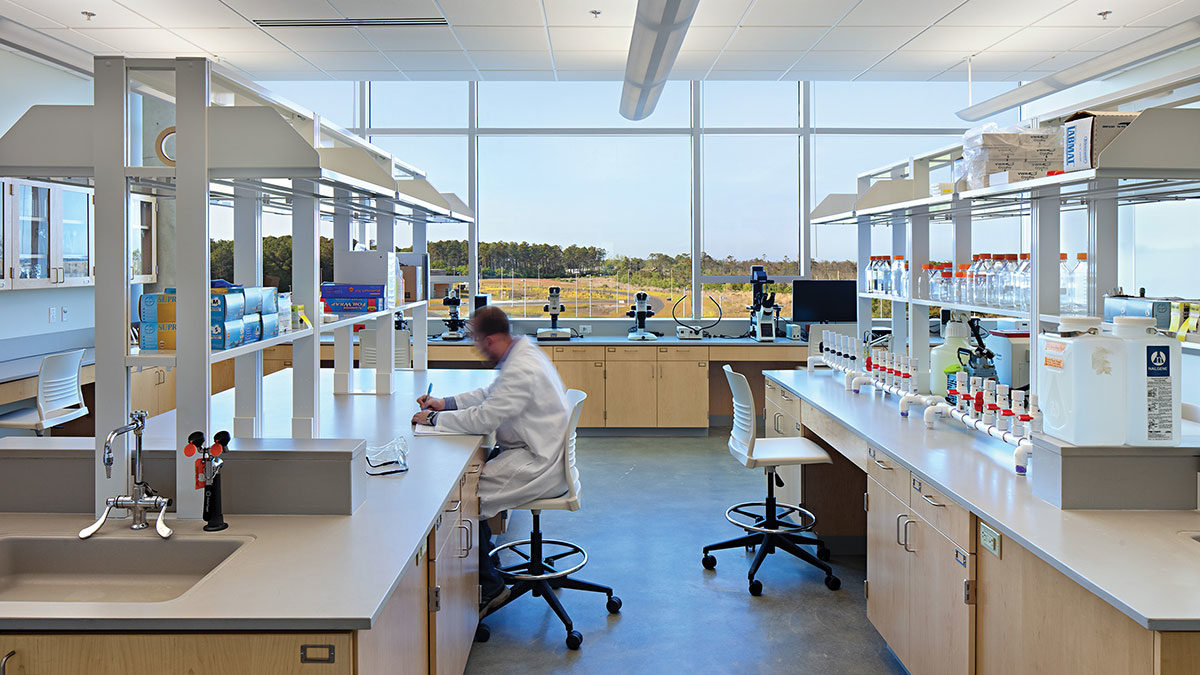
Laboratories around the world provide the high-tech environments researchers need to uncover groundbreaking medical therapies, make agricultural advancements, and develop innovative approaches to the world’s greatest challenges. Successful laboratories are the result of extensive planning, collaboration, and coordination between the design team and all impacted stakeholders. Even the smallest detail, performed incorrectly, can have a detrimental impact on lab function and safety – so getting these spaces right for the scientists working in them is critical. Read on for our top 10 tips for a successful lab design process:
1. Involve all stakeholders in your design kick off meeting – and encourage ongoing, regular input.
This is a hot topic in lab design right now, as involving all stakeholders early and often in the design process is recognized as critical but can present a variety of challenges. This group potentially includes many people and many different perspectives, but gathering those differing viewpoints provides an invaluable foundation. Failing to involve a comprehensive stakeholder group at project kick off and in early design decisions will almost certainly result in a cascade of future problems impacting design, construction, and long-term lab use.
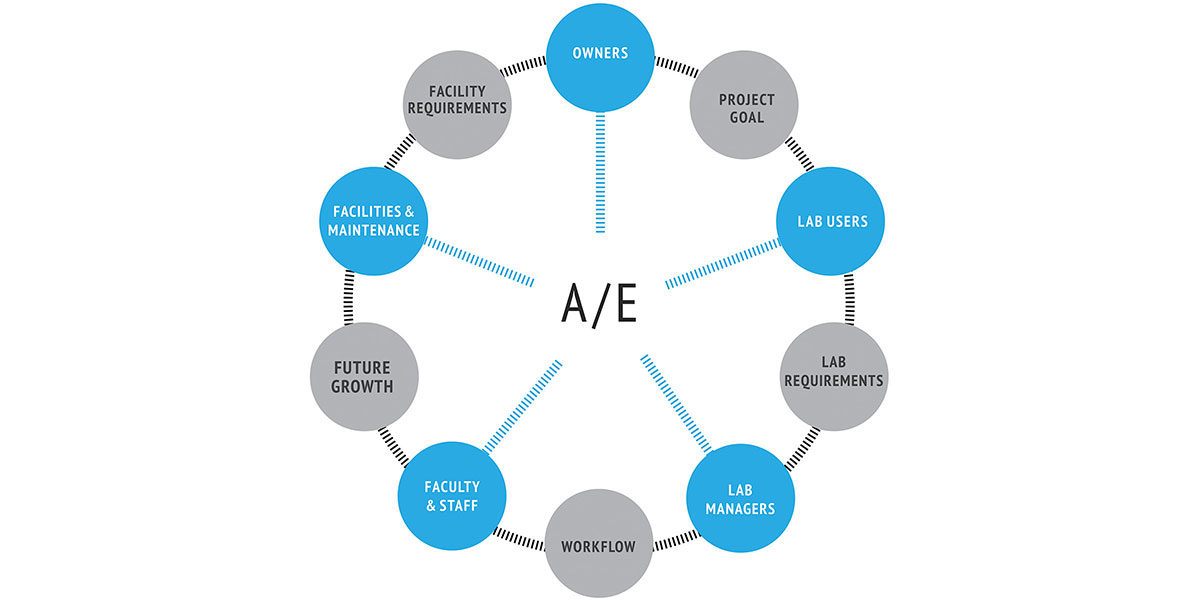
So who do you include? With the designer as the facilitator, stakeholders that should be present and involved at the kick off meeting include the owners, lab users, lab managers, faculty and staff, and facilities and maintenance personnel. Each group is connected to the other and has something valuable to contribute:
- Between owners and lab users, clarity on the project goal and lab function can be established;
- Between the lab users and lab managers, a clear understanding of workflows and processes within the lab can be gained;
- Between lab managers and faculty and/or staff, critical lab requirements including utilities, emergency power, lab equipment, finishes, ceiling heights, and storage requirements can be understood;
- Between faculty and/or staff and the facilities and maintenance team, goals for future growth and lab flexibility can be realistically established and an understanding of maintenance needs can be determined;
- Between the facilities and maintenance staff and owners, facility engineering requirements can be fully understood.
Perhaps most importantly of all, beginning with an all-inclusive kick off meeting establishes a shared vision for the project, which can then be used throughout the design phases to ensure consistent execution.
2. Size the lab to meet user requirements.
Sizing the lab to meet user requirements may seem like a given, but all too frequently a visit to a lab facility will reveal this is a major issue. A failure to effectively size the lab to meet user requirements can result in inadequate bench and equipment storage space, inflexibility or limited growth, and limited functionality in the lab. This issue often embodies itself in lab spillover into undesired spaces such as corridors and common spaces and can result in a variety of safety hazards.
By working with lab users and managers early in the design process, the design team can appropriately size the lab by determining the number and type of lab users (i.e. Researchers? Graduate or undergraduate students?), identifying any existing lab equipment and the size of floor-mounted equipment to establish clearances and adequate bench size, and developing lab metrics and modules. Through diagrams, plans, and workflows, the design team can coordinate effective, efficient use of space, safely maximizing opportunities for shared space and collaboration between scientists.
3. Determine control areas early in design.
With emerging design trends geared toward transparency and “research on display,” determining necessary control areas early in design enables lab planners and architects to create a building design that features desirable aesthetics – and meets all code and safety requirements. Primarily, determining control areas early in design focuses on defining the type and quantity of the chemicals that may be used in the lab to understand the impact on the overall design. A failure to understand early on the presence of flammable, combustible, explosive, and potentially hazardous chemicals can lead to code issues, egress and exit concerns, HVAC duct routing complications, and a lack of adequate chemical storage rooms.
To determine these control areas, involve Environment, Health & Safety (EH&S) in the early schematic design phase, identify the types and maximum quantities of the chemicals that will be present, use these totals per lab to establish control area grouping that benefits the overall building design, and develop control areas that allow for future change in lab use and/or a potential increase in chemicals.
4. Plan for chemical storage.
In any lab setting with heavy chemistry and chemical experiments, planning for appropriate and adequate storage is critical to avoid potential safety hazards and code issues. By working with EH&S early in the design process as well as collaborating with lab users and managers, designers can identify the types of chemicals and gases requiring storage and determine the resulting types of necessary storage. This effort eliminates the potential for inappropriate, dangerous storage on bench tops or inside fume hoods and supports a safe, effective lab environment.
5. Coordinate fume hoods with HVAC control system.
For lab safety, containment, and pressurization purposes, lab planners must work closely with the team’s mechanical engineers to ensure coordination between the fume hoods and the HVAC control system. This process begins by identifying the types of fume hoods that will be used in the lab, identifying the types of controls needed based on the hood type and quantity, and integrating EH&S or facility design requirements throughout the coordination effort. This coordination ensures adequate air change rates based on both facility requirements and lab type as well as ensuring lab pressurization and fume hood containment can be achieved.
6. Collaborate with mechanical, electrical, and plumbing engineers to ensure well-coordinated drawings.
This may seem like a given, but all it takes is entering a lab in which wall-mounted piping interferes with shelving or electrical devices conflict with casework to recognize the negative impact of poor coordination with MEP disciplines. Both an aesthetic and constructability issue, these conflicts create headaches for contractors and future maintenance personnel and negatively impact the visual of the lab.
To develop well-coordinated drawings, the lab planner, architect, and MEP engineers must work together and back-check drawings thoroughly. The use of technical tools such as BIM or Revit can help in this effort, but be sure to check your view plane to ensure a comprehensive look at the space. We recommend running clash-detection programs and examining equipment and ceiling heights with the mechanical engineer.
7. Get a solid, comprehensive equipment list.
As the lab planner, scrutinize the equipment list you receive from your client carefully. Part of the lab planning role must involve guiding the client to obtain the information you need – particularly because your primary contact may be someone who isn’t familiar with each nuance of lab equipment or your data needs. Obtaining a list with detailed information is fundamental to the lab layout, touching issues such as:
- Spatial planning of the lab;
- Determination of what type of casework on which to place equipment;
- Understanding power, data, and backup power requirements; and
- Planning for plumbing and HVAC services.
 We recommend a combined approach of gathering information from the client, inspecting equipment in the field to verify that accurate information has been captured, and providing the comprehensive list back to the client for their validation. The finalized list should be provided to your MEP team for use as a coordination tool (revisit tip #6 for why this matters). Additionally, through programming interfaces such as Dynamo or AutoLISP, you can import this data directly into your BIM model or CAD drawings to create equipment for your plans automatically. If your data is accurate and comprehensive, this can be a huge timesaver and benefit to all disciplines on the design team.
8. Consider equipment heat gains.
Imagine you’re working in a lab with equipment that runs continuously or generates a substantial amount of heat at intermittent times. If the cooling system isn’t adequately sized, not only are you going to be quite uncomfortable and less efficient in your work, there will also be a negative impact on the life and maintenance of that lab equipment.
Considering equipment heat gains and coordinating with the mechanical engineer is fundamental to lab function, particularly for those spaces with heat-generating equipment such as ultralow freezers, refrigerators, or centrifuges. If the heat gain information can’t be provided by the equipment manufacturer, the mechanical engineer can carefully calculate to ensure proper cooling loads are accounted for in the design. Additionally, ASHRAE provides guidance on heat load calculations for some common lab equipment.
9. Check door widths, turning clearances, and equipment paths throughout the facility.
By its nature, most lab facilities need to maintain some degree of flexibility, which means equipment may need to travel throughout the building or be removed entirely in the future. To avoid permanently trapping equipment once it’s in the lab, lab planners must consider and review a pathway for each piece of equipment to a building exit, accounting for all doors and turns from point of delivery to point of use and back again. The failure to check this is particularly likely to crop up in renovations, where lab equipment may not be on a scope of work but should still be considered.
10. Know when and when not to use flexible casework.
In an increasingly competitive and rapidly changing world, flexible casework can provide the ultimate laboratory benefit, particularly for environments where projects change frequently. However, at a 20 to 35 percent increase in cost over fixed casework, it is due diligence on the part of the lab planner to guide the client through a discussion of their specific needs and plans for each lab space to determine if the investment in flexible casework is the right solution.
There are a variety of scenarios that potentially make fixed casework a better selection than flexible or mobile casework. These include equipment access, stability or vibration concerns, and the likelihood or regularity of reconfigurations. Particularly in the case of vibration, always verify if equipment has vibration criteria before considering flexible casework, as a microscope on a moveable table could pose a research problem (for example). In these cases, the lab planner should consider microscope tables, marble balance tables, or fixed bench. If vibration and other equipment criteria isn’t a concern and the lab will be reconfigured frequently, flexible casework may be the best, most cost-effective solution long term.
Armed with these 10 tips, owners and designers can be prepared to embark on a more successful lab design and planning process.
Brian Brader, RA, NCARB, is an architect and lab planner joined Clark Nexsen in 2016 and left the firm in 2020.
Chris Bartlett, LEED AP BD+C, is a lab planner who was with Clark Nexsen for 10 years before moving on to pursue other opportunities.
The “Top 10 Pitfalls of Lab Design” was initially presented at the 2017 Lab Design Conference.
